To begin entering a new warranty claim:
-
If you are a Customer User, click Enter Claim from the Crik-IT main page.

-
If you are a Rep or In-house user, click the Customer name to drill-down into the customer details, then click the Claim button.

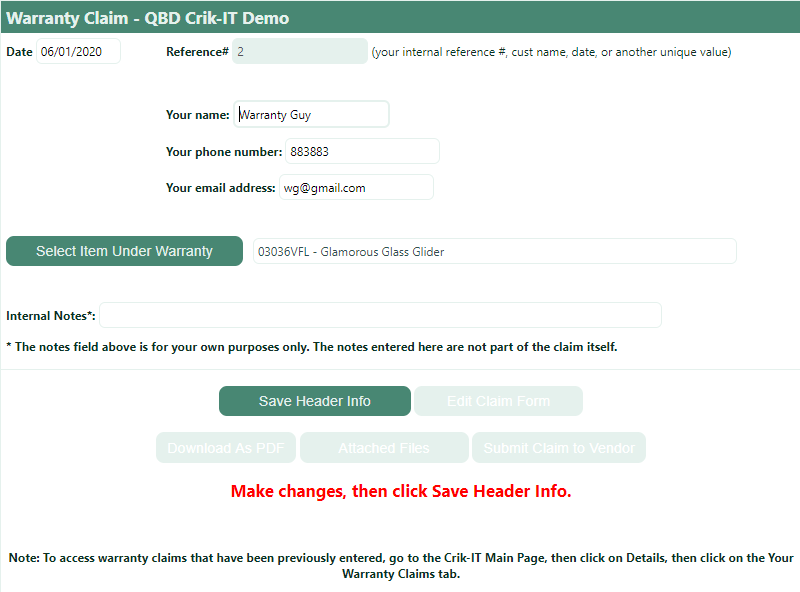
Now you will be presented with the warranty claim header screen where you will enter your contact information and select the defective item for which you are submitting a claim. Click the Save Header Info button when done.
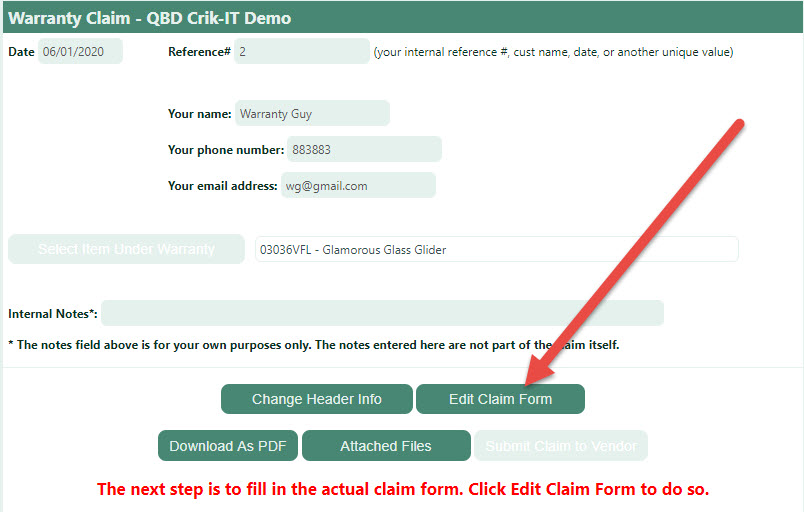
The next step is to fill in the details about this claim. Click the Edit Claim Form button. Note that Crik-IT guides you through the process with bold red instructions.
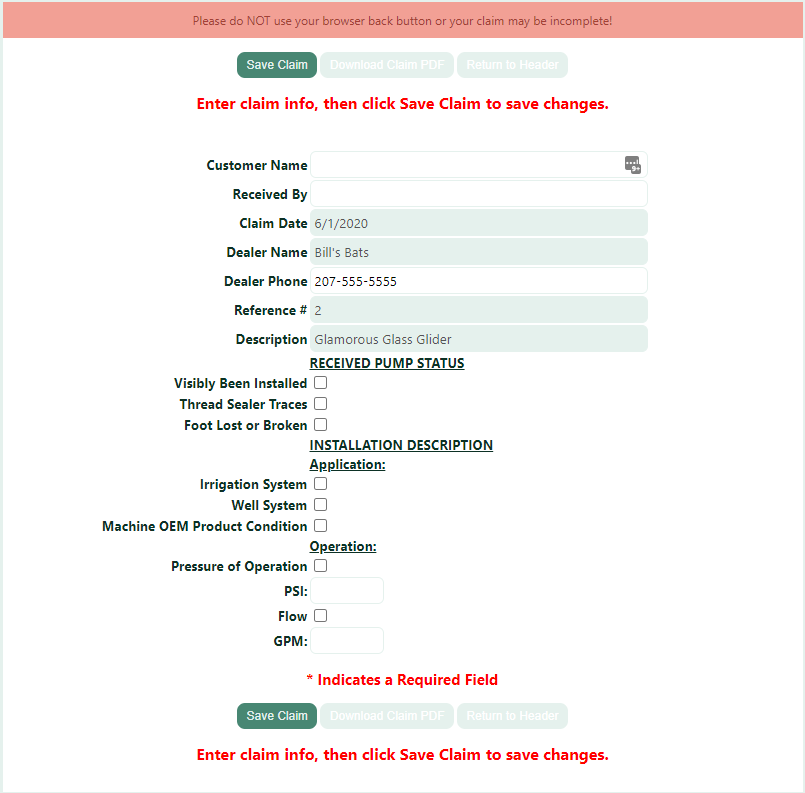
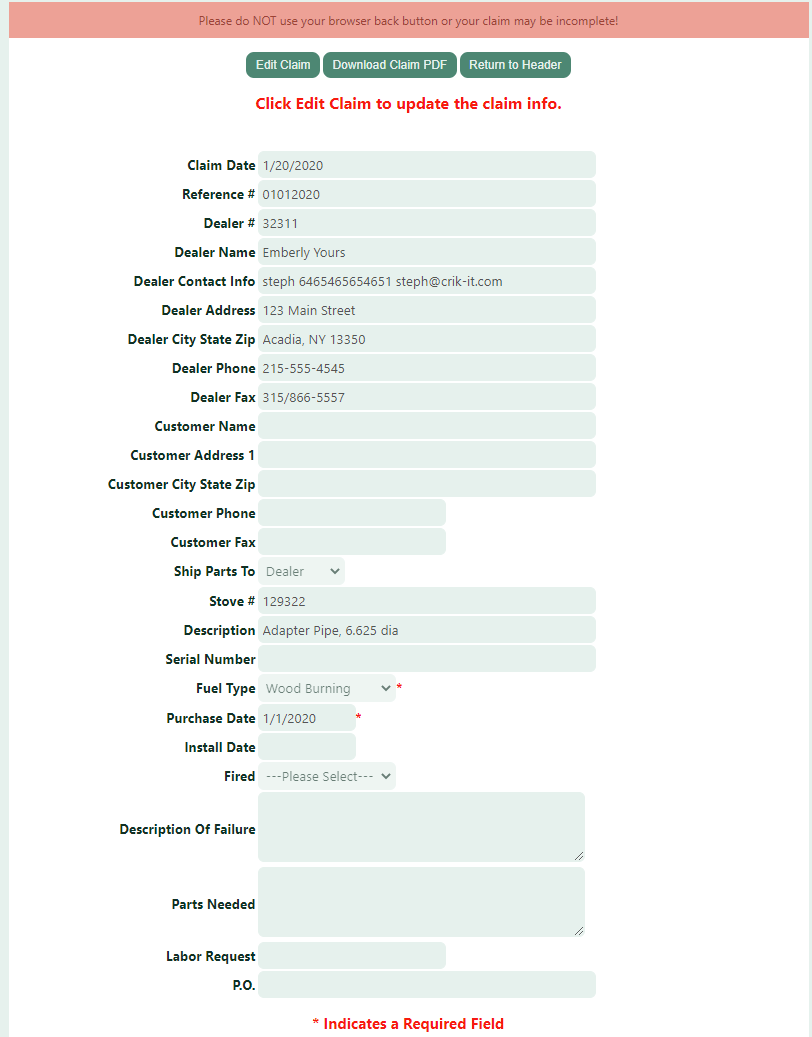
Now you will be presented with a form to fill out. The specific fields that appear will differ from what is shown below. and will be based on the warranty requirements for the item for which you are entering a claim. A couple different examples are shown below. When you have completed the form, click the Save Claim button. After saving, to return to the previous screen, click the Return To Header button (will be disabled until after you save this form).
Example 1:
Example 2:
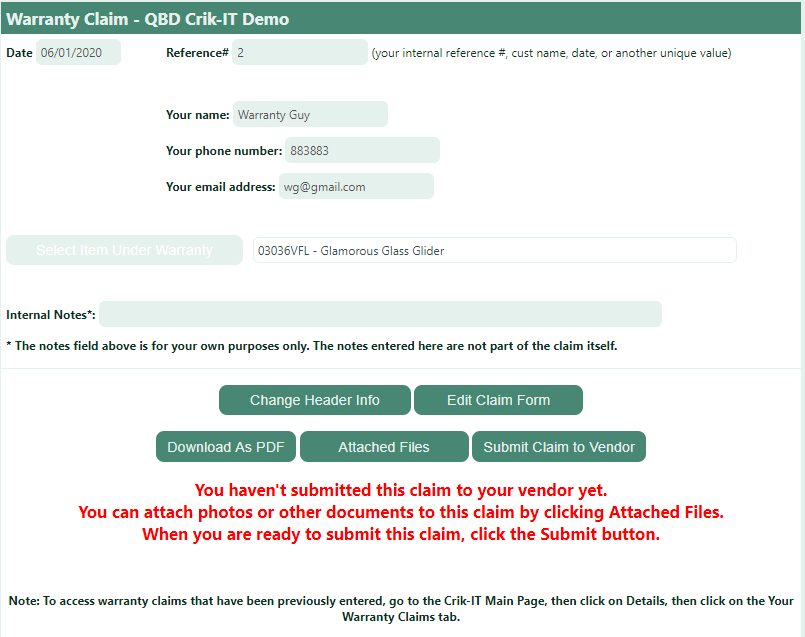
When you return to the header page, you can do a number of things.
- Change Header Info: this button let's you change the contact info related to this claim. You cannot change the item under warranty.
- Edit Claim Form: this button takes you back to the form where you entered the details about this claim.
- Download As PDF; this button allows you to download a copy of the claim in PDF form.
- Attached Files: This button allows you to upload and save photos or other documents that are related to this claim. For each file you attach to this claim, you can indicate if that file should be sent as an attachment on the email sent to the vendor's warranty claims folks when you submit the claim.
- Submit Claim to Vendor; this button sends an email to the vendor's warranty claims department and a copy to you. The email contains the claim as a PDF attachment and any files you have attached to this claim AND that you have indicated should be emailed with the claim. The status of the claim will be changed from "Not Yet Submitted" to "Submitted - Not yet acknowledged by vendor".
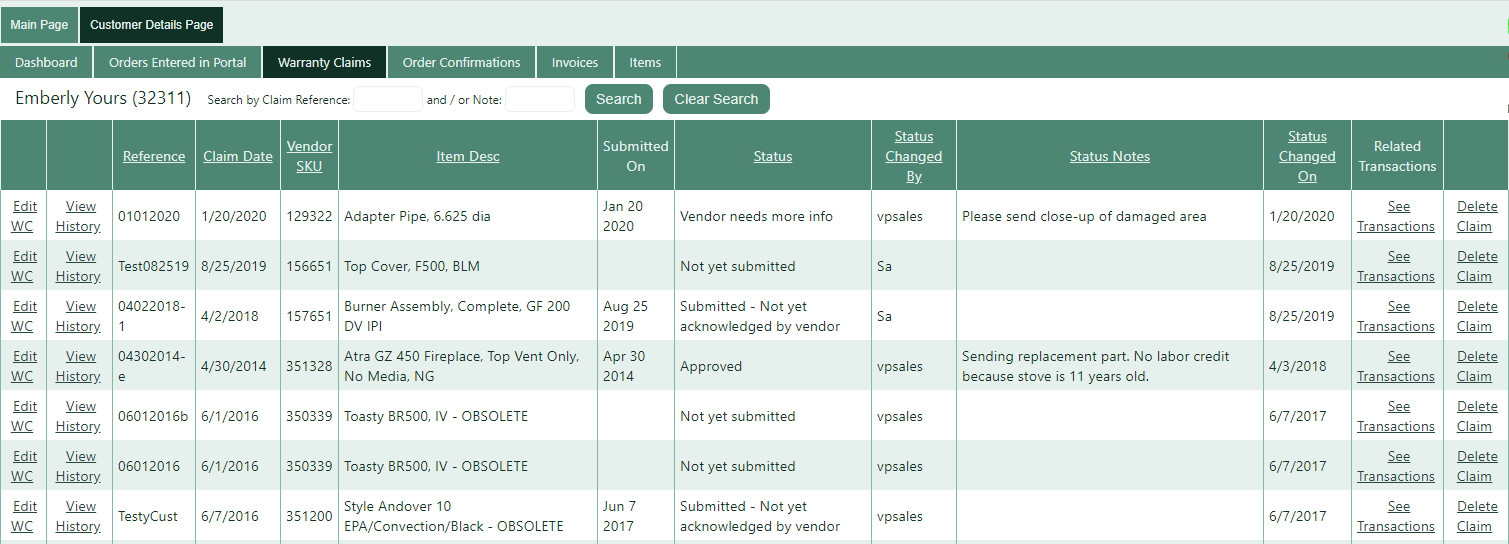
FYI: To see previously entered claims:
-
If you are a Customer User, click "See Previous Claims" from the Crik-IT main page.
- If you are a Rep or In-house user, click the Customer name to drill-down into the customer details, then go to the Warranty Claims tab.
You will see the page shown below listing all the claims previously entered. You can edit or delete the claim and track the status of the claim from here.